

Jellyfin on a NAS: your own media server, no subscription
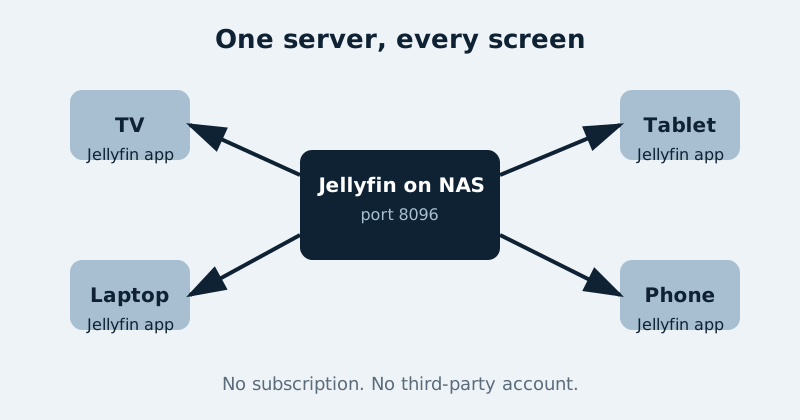
Jellyfin streams your own movies, shows, music and home videos to every screen in the house — with no subscription, no premium tier, and no feature held back behind a paywall. Run it in Docker on a NAS and a modest Intel chip can serve the whole household.
Published Nov 17, 2026 · Last updated Nov 18, 2026
Jellyfin is free and open-source software, a community fork that stayed free when other media servers commercialised. Every feature in this guide — hardware transcoding, mobile apps, user accounts, Live TV support — is included for everyone. The work is not paying; the work is organising your files so Jellyfin can identify them, and turning on hardware transcoding so a small NAS CPU is not asked to re-encode 4K video in software. Get those two things right and Jellyfin feels effortless. Get them wrong and you get mismatched posters and buffering.
Direct Play, Direct Stream and transcoding — in plain language
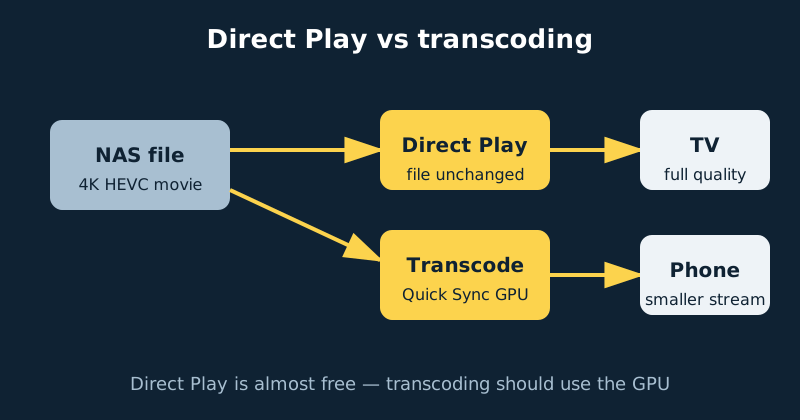
When a TV, phone or browser asks for a video, Jellyfin first tries Direct Play: it sends the file exactly as stored, using almost no CPU. If the container is unsupported but the video and audio codecs are fine, it Direct Streams — repackaging the same streams into a different container, still cheap. Only when a client cannot handle the codec, the bitrate is too high for the connection, subtitles must be burned in, or HDR must be converted to SDR does Jellyfin transcode: decode every frame and re-encode it live. One 4K software transcode can saturate a small NAS. The same job on Intel Quick Sync — the fixed-function video engine built into most Intel integrated graphics — can substantially reduce CPU usage compared with software encoding. How much headroom you actually get depends on the Intel generation, the codecs involved, the resolution, HDR tone mapping, whether subtitles must be burned in, and whether every stage of the pipeline stays on the hardware — some stages can fall back to software, which pushes the load back onto the CPU — so test with the media and clients you really use. Even qualified, that difference is the whole ballgame on NAS hardware.
What you need
- A NAS or server with Docker and Docker Compose, and enough storage for your media. Media files are large and irreplaceable rips take time, so store them on your main redundant volume.
- An Intel CPU with integrated graphics and Quick Sync if you want painless hardware transcoding — common in Intel-based NAS models and mini PCs. Jellyfin also supports NVIDIA NVENC and AMD VA-API, but Intel Quick Sync is the simplest and most power-efficient path for a NAS.
- Media organised by type: separate top-level folders for movies, shows and music. Jellyfin identifies content by folder and file names, not by reading your mind.
- Clients: free Jellyfin apps for most smart TVs, phones, tablets and streaming sticks, plus any modern web browser. No account with any third party is required.
- Your own legally obtained media. Jellyfin is a player and organiser for files you own; this guide does not cover acquiring content.
Step-by-step installation
- Organise the media first. Create
/media/movies,/media/tvand/media/music. Put each movie in its own folder namedMovie Name (Year)with the file inside named the same way. Put shows underShow Name/Season 01/Show Name S01E01.mkv. Ten minutes of tidying here saves hours of fixing wrong matches later. - Create config and cache folders on the NAS for Jellyfin’s database, artwork and transcode cache. Keep the config folder on fast storage if you can; a large library’s database and posters feel noticeably snappier on an SSD.
- Write the compose file (full example below), passing through
/dev/drifor Intel graphics and mapping your media folders read-only where possible. - Start it with
docker compose up -dand openhttp://your-nas-address:8096. The setup wizard creates the administrator account and asks for your first libraries. - Add libraries by type: Movies pointing at
/media/movies, Shows at/media/tv, Music at/media/music. Library type matters — it decides which metadata sources Jellyfin queries and how seasons and episodes are grouped. Let the first scan finish before judging the results. - Turn on hardware transcoding. Go to Dashboard › Playback › Transcoding, set Hardware acceleration to Intel QuickSync (QSV), enable decoding for the codecs your chip supports (H.264 and HEVC on most recent chips, VP9 and AV1 only where the generation supports them), and enable hardware encoding and tone mapping if you play HDR files on SDR screens.
- Prove it works. Play a high-bitrate file in a browser, lower the playback quality to force a transcode, then open Dashboard › Active Devices. The session should report hardware transcoding. If CPU usage spikes to near 100 percent instead, the GPU is not being used — see troubleshooting below.
- Create a user for each person instead of sharing the admin login. Regular users get their own watch history, favourites and resume points, and you can restrict which libraries each account sees — useful for separating kids’ content.
- Install the client apps and sign them in to the server address. On the home network that is the NAS address and port 8096. Test on the TV you actually use, with the files you actually watch, including subtitles.
- Decide on remote access last. Do not expose port 8096 directly to the internet. Use a VPN-style connection such as Tailscale for away-from-home viewing, or a hardened HTTPS reverse proxy with strong passwords. Remote streaming also makes transcoding matter more, because home upload bandwidth usually forces a lower bitrate.
A concrete Docker Compose example
services:
  jellyfin:
    image: jellyfin/jellyfin:latest
    container_name: jellyfin
    ports:
      - "8096:8096"
    volumes:
      - /volume1/docker/jellyfin/config:/config
      - /volume1/docker/jellyfin/cache:/cache
      - /volume1/media:/media:ro
    devices:
      - /dev/dri/renderD128:/dev/dri/renderD128
    group_add:
      - "104"   # replace with your host render group id:
                # getent group render | cut -d: -f3
    restart: unless-stopped
Two lines do the transcoding work: the devices entry passes the Intel render node into the container, and group_add gives the container permission to use it. The render group ID differs between systems, so always look yours up with the command in the comment rather than copying 104 blindly. If /dev/dri does not exist on the host at all, the integrated graphics are disabled in firmware or the driver is not loaded — fix that on the host first, because no container setting can invent a GPU the host cannot see.
About the :latest tag in that example: it is there as the convenience option, and it is worth knowing what you are accepting. latest follows every stable release, including major versions, so recreating the container shortly after a major Jellyfin release lands that upgrade whether you planned it or not. A major-version tag (for example jellyfin/jellyfin:12) stays within that major line, and an exact version tag pins one precise release — nothing changes until you edit the tag yourself. Whichever you choose, back up the /config folder and read the release notes before a major upgrade: major releases can change the database in ways that make rolling back difficult.
Getting the library right
Metadata comes from online databases matched by name and year, so accuracy is a naming discipline. Keep years in movie folder names, use S01E01 numbering for episodes, and avoid stuffing quality tags, release-group names and dots everywhere into filenames. When a match is wrong, use Identify in the item’s menu and search manually rather than renaming at random. For music, embedded tags rule: Jellyfin reads artist, album and track data from the files themselves, so fix bad tags in the files. Finally, schedule library scans for off-hours and let scheduled tasks such as thumbnail extraction run overnight after a big import.
Common mistakes and troubleshooting
Transcoding still pins the CPU
The classic causes, in order: the /dev/dri device was not passed into the container; the render group ID in group_add is wrong for your host; hardware acceleration is set to VA-API or None instead of Intel QuickSync (QSV) in the dashboard; or you enabled a codec your chip generation cannot decode in hardware. Check Jellyfin’s transcode log — it shows the exact FFmpeg command and whether the hardware path was used.
Wrong posters, merged movies, split seasons
Almost always naming. Two different movies in one folder, a year missing where two films share a name, or episode files without season-episode numbers will defeat any matcher. Fix the names to the patterns in step 1, then refresh metadata for that library. Do not reorganise by hand inside Jellyfin’s config folders.
Subtitles force a transcode and playback stutters
Image-based subtitles (PGS from Blu-ray, VobSub from DVD) often must be burned into the picture, which forces transcoding even when the video itself could Direct Play. Text subtitles (SRT, and ASS/SSA where the client supports them) are far cheaper. Prefer clients and files with text subtitles, and make sure hardware transcoding works before blaming the network.
Playback buffers on Wi-Fi but not wired
High-bitrate 4K files can exceed what a weak Wi-Fi link sustains, especially through walls. Test the same file on a wired client; if it is smooth, the server is fine and the link is the limit. In Jellyfin you can set a per-user internet streaming bitrate limit, but for home Wi-Fi the honest fix is better coverage or a wired connection for the main TV.
Will your imports hardlink — or silently copy? Run your volume layout through the hardlink checker: it resolves your mounts the way Sonarr and Radarr see them and hands back the corrected single-/data layout if yours would copy.
Official documentation and references
- Jellyfin documentation — the quick start guide
- Jellyfin documentation — hardware acceleration
- Jellyfin documentation — server configuration
- Jellyfin documentation — clients and playback
Frequently asked questions
Is Jellyfin really completely free?
Yes. Jellyfin is free and open-source software, and features such as hardware transcoding that other servers reserve for a paid pass are included for everyone. You still pay for your own hardware, storage and electricity — but there is no subscription and no account required with the project.
Can one small NAS serve several people at once?
Easily, if most streams Direct Play — that costs almost nothing. The limit is simultaneous transcodes. With Quick Sync enabled, a recent Intel integrated GPU can handle several transcoded streams at once — the exact number depends on the chip generation, the codecs and the resolution; in pure software, even one 4K transcode may be too much. That is why verifying hardware transcoding matters more than buying a bigger CPU.
Should Jellyfin be open to the internet for holidays and travel?
Only through a protected route: a VPN-style tool such as Tailscale is the simplest safe option for personal use. A directly exposed media server will be found by scanners within hours, and a weak user password then puts your whole library — and potentially the NAS — at risk.
Running Jellyfin on an Intel box? Unlock the GPU: hardware transcoding with Quick Sync.