

Portainer: manage Docker containers from a web UI, not the terminal
Portainer puts a proper dashboard on top of Docker: every container, stack, image, volume and network on your NAS, visible and manageable from a browser. Starting, stopping, updating and troubleshooting your self-hosted apps stops being a memory test of terminal commands and becomes clicking through a list.
Published Nov 17, 2026 · Last updated Nov 18, 2026
Nothing about Portainer replaces Docker or Compose — it drives them. Underneath, your stacks are still compose files and your containers are still ordinary containers, which means you can adopt Portainer without migrating anything, and remove it later without unwinding anything. It is the single highest-leverage install for anyone whose NAS runs more than a couple of containers, because the things you do most often — check a log, restart a stuck app, pull an update, delete an old image — each become a ten-second job. This guide installs the free Community Edition, walks through those everyday jobs, and covers the security habits that matter for a tool this powerful.
What Portainer can and cannot do
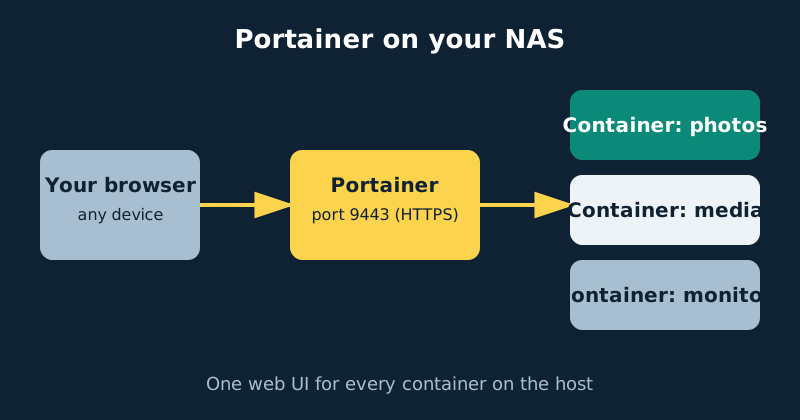
Portainer talks to Docker through the Docker socket — the control channel for the whole engine — and presents it as web pages. You can create and edit stacks by pasting compose files into a web editor, start, stop and recreate containers, read live logs, open a console inside a running container, and inspect images, volumes and networks. What it cannot do is rescue a broken Docker installation, and it should not be your backup tool: Portainer shows you the state of the system, but your data still lives in the volumes and folders your stacks define. One more consequence of that socket access: whoever controls Portainer effectively controls the NAS’s Docker engine, so its login deserves the same respect as an admin account — more on that below.
What you need
- A NAS or server already running Docker. Portainer manages an existing Docker installation; it is not one itself.
- Terminal access for exactly one step — the initial install. After that, the browser takes over.
- Port 9443 free on the NAS for Portainer’s HTTPS web interface.
- A password manager for the admin account you are about to create. Portainer’s admin can control every container, so the password should be long, unique and stored properly.
Step-by-step installation
- Create the stack folder —
portainerinside your usual Docker folder — and put the compose file from the example below into it. - Start it with
docker compose up -d. The compose file creates a named volume calledportainer_dataautomatically; that volume holds Portainer’s own settings and accounts, so treat it as data worth backing up. - Open the interface promptly at
https://your-nas-address:9443. Your browser will warn about the self-signed certificate Portainer generates for itself — that is expected on a home network; proceed to the site. Do this soon after first start: for security, Portainer only allows the initial admin account to be created within a short window after installation. If you miss the window, restart the container (docker compose restart) and the window opens again. - Create the administrator account with a long, unique password. This account can start, stop and delete anything in Docker — do not reuse a password from anywhere else.
- Connect the local environment. Portainer usually detects the Docker socket it was given and offers the local environment immediately. Select it and you will land on a dashboard summarising your stacks, containers, images and volumes — including anything that was already running before Portainer existed.
- Deploy your first stack through the UI. Go to Stacks › Add stack, give it a name, paste a compose file into the web editor, and click Deploy. Use something harmless first — the Uptime Kuma stack from our Compose basics guide is ideal — and watch Portainer create the containers for you.
- Find the logs. Open any container and click Logs. Being able to read a failing app’s logs from your phone, without SSH, is the moment most people are sold on Portainer.
A concrete configuration example
The complete install is this one small compose file. Note the two volumes: the Docker socket, which gives Portainer its control, and its own named data volume:
Read the socket line before you run this. Mounting /var/run/docker.sock gives Portainer extensive control over the Docker host — through that socket it can start any container with any settings, including privileged containers with the NAS’s own files mounted inside. A compromised Portainer account, or a vulnerability in Portainer itself, therefore becomes a route to compromising the whole NAS. That power is the point of the tool, but it comes with a hard rule: never expose Portainer publicly. Reach it on your LAN, or remotely only through a VPN.
services:
  portainer:
    image: portainer/portainer-ce:lts
    container_name: portainer
    restart: unless-stopped
    ports:
      - "9443:9443"
    volumes:
      # The Docker socket means full control of the Docker host — see the warning
      # above. Never expose Portainer publicly: LAN or VPN access only.
      - /var/run/docker.sock:/var/run/docker.sock
      - portainer_data:/data

volumes:
  portainer_data:
The :lts tag tracks Portainer’s long-term-support release line, which suits a set-and-forget NAS tool. Portainer also offers a legacy HTTP interface on port 9000 and a tunnel port (8000) used by remote Edge agents; a home install needs neither published, so this file deliberately leaves both off. Fewer open ports, fewer questions to answer later.
Everyday jobs in Portainer
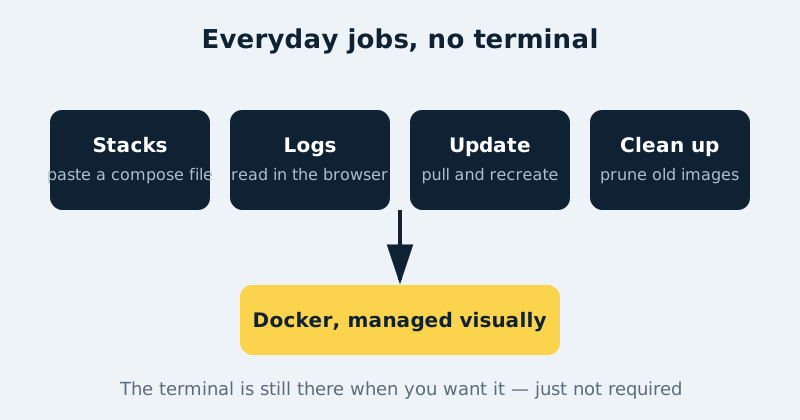
Updating a container: open the container (or its stack), choose Recreate, and toggle on “Pull the latest image”. Portainer downloads the new image and rebuilds the container with the same settings. For a whole stack, editing the stack and redeploying does the same thing — and lets you change a pinned version number at the same time. Cleaning up: every update leaves the old image behind, and images are gigabytes. The Images page shows which are unused; delete those, or use the prune option, and reclaim the space before the NAS complains. Checking health at a glance: the container list shows state and uptime for everything at once, which makes it the fastest way to answer “is it the app, or is it down entirely?” Pair it with a monitoring tool and you will usually know about problems before anyone using the services does.
Two smaller features earn their keep as well. The console opens a shell inside a running container from the browser — invaluable when an app’s documentation says “run this command inside the container” and you are on a tablet, not at a terminal. And any existing container can be duplicated and edited: Portainer reads its current settings into a form, you change the one thing you meant to change, and it recreates the container — a forgiving way to fix a forgotten environment variable or a wrong port on something you originally started by hand.
Common mistakes and troubleshooting
“Portainer is not available” or the setup window expired
The initial-setup timeout is the classic first-run trip-up. Restart the container and open the page straight away. If the page never loads at all, check the container is running and that nothing else on the NAS already uses port 9443.
Exposing Portainer to the internet
Do not port-forward 9443 (or 9000) to the internet, and do not put it on a public reverse-proxy hostname without additional access control. It is an admin panel for your entire Docker host. Reach it on your home network, or remotely through a VPN such as Tailscale — never naked on the internet.
Trying to update Portainer from inside Portainer
Portainer cannot fully recreate itself from its own interface. Update it the way it was installed: in its stack folder, docker compose pull then docker compose up -d. Your settings survive because they live in the portainer_data volume.
Deleting the wrong volume
The Volumes page makes deletion one click, and a volume usually holds the only copy of an app’s data. Portainer warns about volumes in use; take the warning seriously, and never prune volumes as part of routine tidying. Images are disposable — volumes are not.
Official documentation and references
- Portainer documentation — installation and administration guides
- Portainer documentation — installing Portainer Server with Docker on Linux
- Portainer on GitHub — source code and releases
Frequently asked questions
Is Portainer free?
The Community Edition used here is free and covers everything a home NAS needs: unlimited containers on the local host, stacks, logs and image management. The paid Business Edition adds enterprise features — advanced access control, registry management, multi-cluster tooling — that matter in companies, not in a house.
Does Portainer replace Docker Compose?
No — it uses it, but visibility is not the same as management. Containers you deploy in the terminal do appear in Portainer’s container list, where you can inspect, start, stop and read their logs. A Compose project deployed outside Portainer, however, does not automatically become a Portainer-managed stack: it shows up grouped as an external stack with limited control, and you cannot edit its compose file and redeploy it from the web editor the way you can with a stack Portainer deployed itself. Keep the original compose files in a backed-up folder of your own, independently of Portainer — do not assume Portainer can reconstruct an external deployment, and a setup that exists only inside Portainer’s own database is one failure away from being archaeology.
Can Portainer manage Docker on other machines?
Yes. Additional hosts can be added as “environments”, either over the network API or with Portainer’s lightweight Edge Agent installed on the other machine. For a single NAS it is unnecessary, but it is a graceful way to grow to a second box later without changing tools.