

Self-Hosting on a NAS with Docker: A Beginner's Mental Model and First Five Containers
A modern NAS is quietly a small server that happens to store files. Docker is what unlocks the server part: it lets you run proper applications — a smart home hub, an ad blocker, a photo library — each in its own tidy box, without them interfering with each other or with the NAS itself. The vocabulary puts people off more than the technology does. This guide builds the mental model first, in plain language, then walks through a first setup and the five containers most homes get real value from.
Published Nov 17, 2026 · Last updated Nov 18, 2026
The mental model: four ideas and you are done
An image is a packaged application — think of it as an installer plus the app, frozen and read-only. You download an image once, the way you would download an installer. A container is a running copy of an image: the actual live program. You can delete a container and recreate it from the image in seconds, the way reinstalling an app does not delete your documents. That only works because of the third idea: a volume is a folder on your NAS that the container is allowed to read and write. All the data you care about — settings, databases, photos — must live in a volume on the NAS, outside the container, so the container itself stays disposable. A port is how you reach the app: the container listens on its own internal port, and you publish it to a port on the NAS, so visiting the NAS address with that port opens the app's web page.
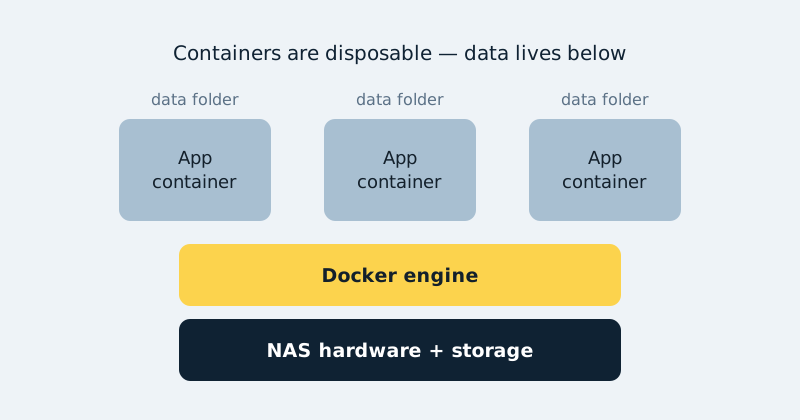
Docker Compose ties it together. Instead of clicking through a setup wizard and forgetting what you chose, you describe each container in a short text file — which image, which ports, which folders — and one command builds or rebuilds everything from that file. That file is your documentation and your disaster recovery in one: if the NAS dies, the compose file plus your data folders rebuild the whole stack.
What you need
- A NAS with Docker or container support (many current models from major NAS makers qualify — but not all of them: Docker support depends on the CPU architecture, how much RAM the model has, and whether the vendor's operating system allows containers at all, so check your exact model before planning around it) and a few gigabytes of free RAM — 4GB is workable, 8GB is comfortable.
- A fixed address for the NAS on your home network, set in your router's DHCP reservations, so bookmarks and other devices always find it.
- A folder structure decided in advance: one top folder for Docker data, with a subfolder per app.
- About an hour, a computer on the same network, and the willingness to read one log file — logs are where containers explain their problems, in plain text.
Step-by-step: your first stack
- Create a shared folder on the NAS called docker, and inside it a folder per app you plan to run — for example docker/adguard and docker/uptime-kuma. Keeping every app's data in one tree makes backups simple.
- Install your NAS's container app (Container Manager, Container Station, or plain Docker, depending on brand) and confirm it can pull a test image.
- Write a docker-compose.yml file describing your first container — the example below runs Uptime Kuma, a friendly status monitor that is an ideal first project because it is useful within minutes.
- Start the stack from the compose file (your NAS container app will have a "project" or "compose" option, or use the command line over SSH).
- Open the app in your browser at the NAS address and the published port, complete its first-run setup, and set a strong admin password.
- Restart the container deliberately once. Watch it come back with your settings intact — that moment, when you trust that containers are disposable and data is safe, is the real lesson.
- Set the container to restart automatically (restart: unless-stopped) so it survives NAS reboots and power cuts.
- Add the compose file and the docker data folder to your NAS backup job before you install anything else.
# docker-compose.yml — a gentle first container
services:
  uptime-kuma:
    image: louislam/uptime-kuma:2
    container_name: uptime-kuma
    restart: unless-stopped
    ports:
      - "3001:3001"        # NAS port 3001 -> app port 3001
    volumes:
      - /volume1/docker/uptime-kuma:/app/data
Read it top to bottom: use this image, name the container, restart it unless I say stop, publish port 3001, and store its data in this NAS folder. Every compose file you will ever write is a variation on those five lines.
One detail on that image line: the :2 tag follows Uptime Kuma's current 2.x major line, so pulling updates brings you 2.x releases but never a surprise jump to a future 3.x. If you already run an older v1 install, do not just change the tag — the v1-to-v2 upgrade has migration steps, so read the Uptime Kuma release notes first and back up the data folder before you switch.
The first five containers worth running
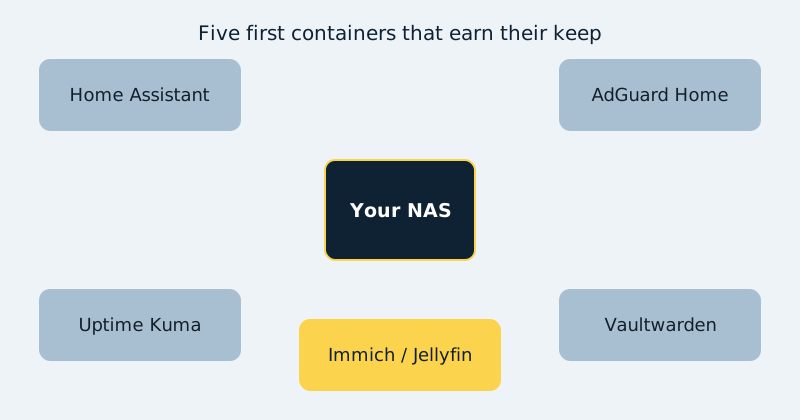
1. Home Assistant — the smart home hub covered across this site; in Docker you manage its add-ons differently, but the core is identical. 2. AdGuard Home — network-wide ad and tracker filtering at the DNS level, with a dashboard anyone can understand. 3. Uptime Kuma — monitors your services, your NAS, and even websites, and alerts you when something goes down, which turns "the internet is broken" guesswork into facts. 4. Vaultwarden — a self-hosted password manager compatible with Bitwarden apps, light enough to run anywhere. 5. A photo or media app — Immich for photos or Jellyfin for video, whichever matches the files your NAS already holds. Add them one at a time, weeks apart if you like. A stack you understand beats a stack of twenty mysteries.
House rules that prevent future pain
Pin major versions rather than floating on "latest" for anything important, and read release notes before big upgrades. Never store the only copy of anything inside a container — if deleting the container would delete the data, the volume mapping is wrong. Keep every compose file in one place and back it up. And resist port collisions by keeping a simple list of which app uses which port; port 3001 can only belong to one container at a time.
Common mistakes and troubleshooting
The container starts, then exits. Read its log — the last lines almost always say why, commonly a missing folder permission or a port already in use. Settings vanish after an update. The app's data was not in a volume; fix the mapping, restore from backup, and the problem never returns. The web page will not load. Check in order: is the container running, is the port published, are you using the NAS's current IP address, and is a NAS firewall rule blocking it? Time-based features behave oddly. Containers need the right timezone — set the TZ environment variable on apps that schedule anything — TZ=Etc/UTC is a safe neutral default, or substitute your own IANA timezone (for example TZ=Europe/London or TZ=America/New_York). Updates make you nervous. That is healthy. Snapshot or back up the app's data folder first, update one container at a time, and keep the previous image tag in the compose file so rolling back is a one-line change.
Official documentation and references
- Docker documentation — the official get-started guide
- Docker documentation — Docker Compose concepts and workflows
- Docker documentation — the complete Compose file reference
FAQ
Is Docker the same as a virtual machine?
No. A virtual machine emulates a whole computer, with its own operating system, and costs gigabytes of RAM. Containers share the host's Linux kernel and package only the application and its libraries, so a typical home container uses tens or hundreds of megabytes. On a small NAS, that efficiency is the difference between running two things and running ten.
What happens to my containers when the NAS reboots?
With a restart policy set, they come back on their own in seconds. Without one, they stay stopped until you start them — which is why setting restart: unless-stopped on every service is step seven, not an afterthought. Your data is unaffected either way, because it lives in folders on the NAS.
Can I break the NAS by experimenting?
It is hard to. Containers are isolated from the NAS system itself, and the nuclear option — delete the container, delete its data folder, start again from the compose file — is always available. Be clear about what that isolation is, though: it is process isolation, not a complete security boundary. Containers share the host's Linux kernel, and a container given mounted folders, privileged mode, or access to the Docker socket can reach a great deal of the host. So avoid privileged containers, mount only the folders an app genuinely needs, and do not expose the Docker socket to a container unless you understand what it hands over. The realistic risks are mundane: filling the storage pool with images, or exposing a container to the internet carelessly. Keep remote access behind one of the safe methods in our remote access guide and you avoid the second entirely.