

Smart Locks and Garage Doors, Safely: Local Control with Home Assistant
Locks and garage doors are the two devices where a smart home stops being a convenience and becomes a security decision. Done badly, they add a cloud account, a subscription and a new way to be locked out. Done locally with Home Assistant, they get better than the factory option: instant status, careful automations, and control that keeps working when the internet does not.
Published Nov 17, 2026 · Last updated Nov 18, 2026
What you need
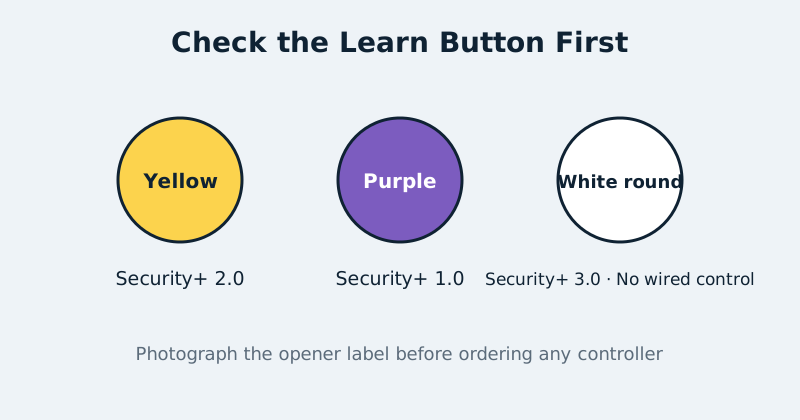
For a door lock, you need a lock that speaks a local protocol Home Assistant can use directly — Z-Wave and Zigbee locks are the established choices, and Matter-over-Thread locks are the modern option — plus the matching radio already running in your setup. Prefer locks that report their real state, support per-user codes managed locally, and retain a physical key cylinder. For a garage door, you need to identify your opener before buying anything: find the learn button colour and the label on the motor unit. A yellow learn button means Security+ 2.0; purple, orange or most red buttons mean Security+ 1.0; a round white button on the newest openers means Security+ 3.0, which moved accessory communication to encrypted Bluetooth and, as of November 2026, cannot be controlled by wired third-party controllers at all. For Security+ 2.0 and 1.0, a ratgdo-style ESPHome controller board wires into the opener's own terminals and speaks its protocol locally. Older and non-Chamberlain openers with plain dry-contact terminals can use the same style of board in dry-contact mode, plus reed switches so the system actually knows whether the door is open or closed. You also need a ladder, basic hand tools, and an hour when nobody needs the car.
The safety rules that come first
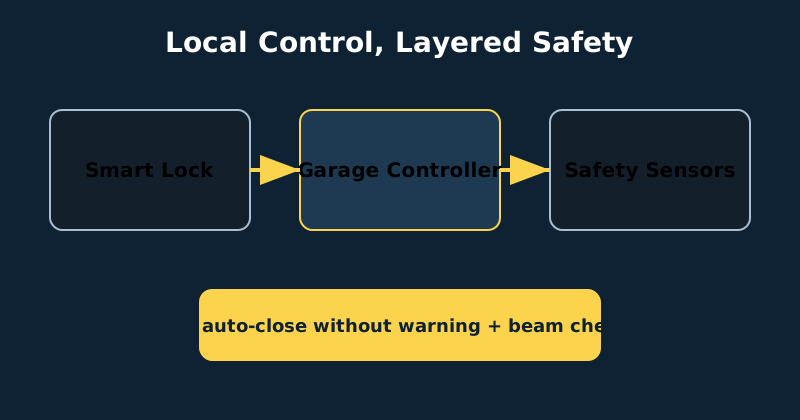
Three rules govern everything in this guide. First, never defeat or bypass the opener's safety beam or auto-reverse: any controller you add works alongside those systems, never instead of them, and you test the beam after installation. Second, a garage door should never close automatically without warning — use a spoken or audible alert and a delay, require the obstruction sensor to report clear, and make cancelling effortless. Third, every smart entry point keeps a non-smart fallback: a key for the lock, the wall button and remotes for the garage, and codes that work when Home Assistant is mid-reboot. If a design violates one of these, it is not a clever automation; it is a liability with good branding.
Garage: install a local controller
- Identify the protocol. Photograph the opener label and learn button. Yellow is Security+ 2.0; purple or red is usually Security+ 1.0 (some red-button openers have no digital communication and need dry-contact mode); round white is Security+ 3.0 — stop there, because no wired controller applies. Then, before ordering anything, confirm the exact model number from that label against the controller manufacturer's current compatibility list. Learn-button colour is a strong hint, not an infallible identifier — a five-minute check against the list beats a return and a rewire.
- Flash before you climb. At your desk, flash the controller board with its ESPHome firmware, choosing the protocol you identified, and adopt it in Home Assistant. Configuring on the ground beats configuring on a ladder.
- Power down and wire. Unplug the opener. Connect the board to the opener's wall-control and obstruction-sensor terminals as its wiring diagram shows — typically three wires for Security+ models, with the existing wall panel passing through. For dry-contact openers, wire the relay output to the push-button terminals and fit the reed switches at the top and bottom of the door travel.
- Restore power and verify status. The board should report door position — open, closed, opening, closing — plus obstruction state and the opener light on Security+ models. Open and close from the wall button first and watch Home Assistant follow.
- Test every control path. Test the dashboard control, the wall button, a car remote and a voice-free automation trigger. Then block the safety beam and confirm the door reverses and the controller reports the obstruction.
- Add the forgotten-door automation. Start with notification only: door open for fifteen minutes after sunset sends an actionable alert with a Close button. Add automatic closing, if at all, only after weeks of trustworthy status reporting — and always with a warning announcement first.
# Example automation: warn, then notify — never silently auto-close
automation:
  - alias: "Garage left open - evening warning"
    trigger:
      - platform: state
        entity_id: cover.garage_door
        to: "open"
        for: "00:15:00"
    condition:
      - condition: sun
        after: sunset
      - condition: state
        entity_id: binary_sensor.garage_obstruction
        state: "off"
    action:
      - service: notify.mobile_app_phone
        data:
          title: "Garage door is open"
          message: "Open for 15 minutes and it is after sunset."
          data:
            actions:
              - action: "CLOSE_GARAGE"
                title: "Close the door"
              - action: "LEAVE_IT"
                title: "Leave it open"
That notification is only half the system: tapping a notification button does nothing by itself — an automation has to listen for the action event. Add this companion automation, or the Close button is decoration. Note the obstruction condition, and note when it runs: it is checked again here, at the moment the close command is issued. The beam was clear when the alert was sent, but a car, a bike or a person can move into its path in the minutes between the alert and your tap — the state at notification time proves nothing about the state now.
# Companion automation: handle the notification's Close button
automation:
  - alias: "Garage - close from notification"
    trigger:
      - platform: event
        event_type: mobile_app_notification_action
        event_data:
          action: "CLOSE_GARAGE"
    condition:
      # Re-checked at closing time, on purpose — see above.
      - condition: state
        entity_id: binary_sensor.garage_obstruction
        state: "off"
    action:
      - service: cover.close_cover
        target:
          entity_id: cover.garage_door
      - service: notify.mobile_app_phone
        data:
          title: "Garage door"
          message: "Closing the garage door now."
    mode: single
A note on Security+ 1.0 specifically: door status reporting depends on a compatible wall panel — panels such as the 889LM communicate in a way the controller can listen to — and emulation modes exist when no compatible panel is present, with some trade-offs for wall-panel features. Dry-contact mode is the honest fallback for 1.0 openers that misbehave. This is exactly why step one is identification: the board is inexpensive, but only the right mode makes it reliable.
Locks: codes, status and honest automations
Install the lock mechanically first and test the door with the door open — a misaligned deadbolt that strains will eat batteries and eventually jam, and no software fixes geometry. Pair it to Home Assistant locally, then manage user codes from Home Assistant or the lock's keypad, giving each person and each purpose its own code: family, cleaner, dog walker, one-time guest. Individual codes are the real security feature, because you can revoke one without changing everyone's. For automations, lock-up routines are safe and valuable — at bedtime, lock any unlocked door and report rather than act if a door is ajar. Auto-unlock by phone presence, by contrast, deserves scepticism: geolocation drifts, phones die, and a door that unlocks itself needs a far higher standard of proof than a door that locks itself. If you use arrival unlocking at all, require multiple confirming conditions and a short window, and never apply it to a door you cannot see from the alert.
Common mistakes and troubleshooting
The most common garage mistake is ordering a controller before identifying the opener — especially discovering a Security+ 3.0 opener afterwards. The second is trusting a tilt sensor alone for door state when a wired controller reports true position and obstruction; sensors fall, batteries die, and automations believe them. If a ratgdo-style board reports status but commands fail on a Security+ 1.0 opener, suspect wall-panel compatibility and try the documented emulation or dry-contact approach rather than rewiring at random. For locks, most 'unreliable' reports trace to weak mesh signal at a metal door frame — add a mains-powered router device nearby — or to a bolt that binds, which shows up as jammed states and short battery life. And never put lock or garage controls on a dashboard that houseguests can open without authentication; convenience screens belong behind your normal Home Assistant login, with critical actions confirmed.
Official documentation and references
- ratgdo — official project site with wiring and setup guides
- ratgdo on GitHub — ESPHome firmware for local garage-door control
- Home Assistant — lock entities and lock services
- Home Assistant — cover entities, the type garage doors use
- ESPHome — the firmware platform behind ratgdo and DIY controllers
FAQ
Does a local garage controller void my opener or need the cloud?
A ratgdo-style board needs no cloud account and does not modify the opener's logic board; it connects to the same terminals the wall panel uses and speaks the opener's own protocol. It leaves the safety systems intact. As with any modification, check your opener's documentation if warranty terms matter to you.
What if my opener is Security+ 3.0?
As of November 2026 there is no wired local controller for Security+ 3.0, because its wall wires carry power only and accessories pair over encrypted Bluetooth verified by the manufacturer. Your local options are limited to monitoring — a door position sensor for status and alerts — while keeping the manufacturer's controls for operation.
Should Home Assistant ever unlock a door automatically?
Locking automatically is low-risk and recommended. Unlocking automatically is a judgement call most homes should decline, or fence behind several simultaneous conditions — presence, time window, a confirming phone action — because a false unlock is a security event, while a false lock is an inconvenience with a key as backup.